
As an Amazon Associate we earn from qualifying purchases.
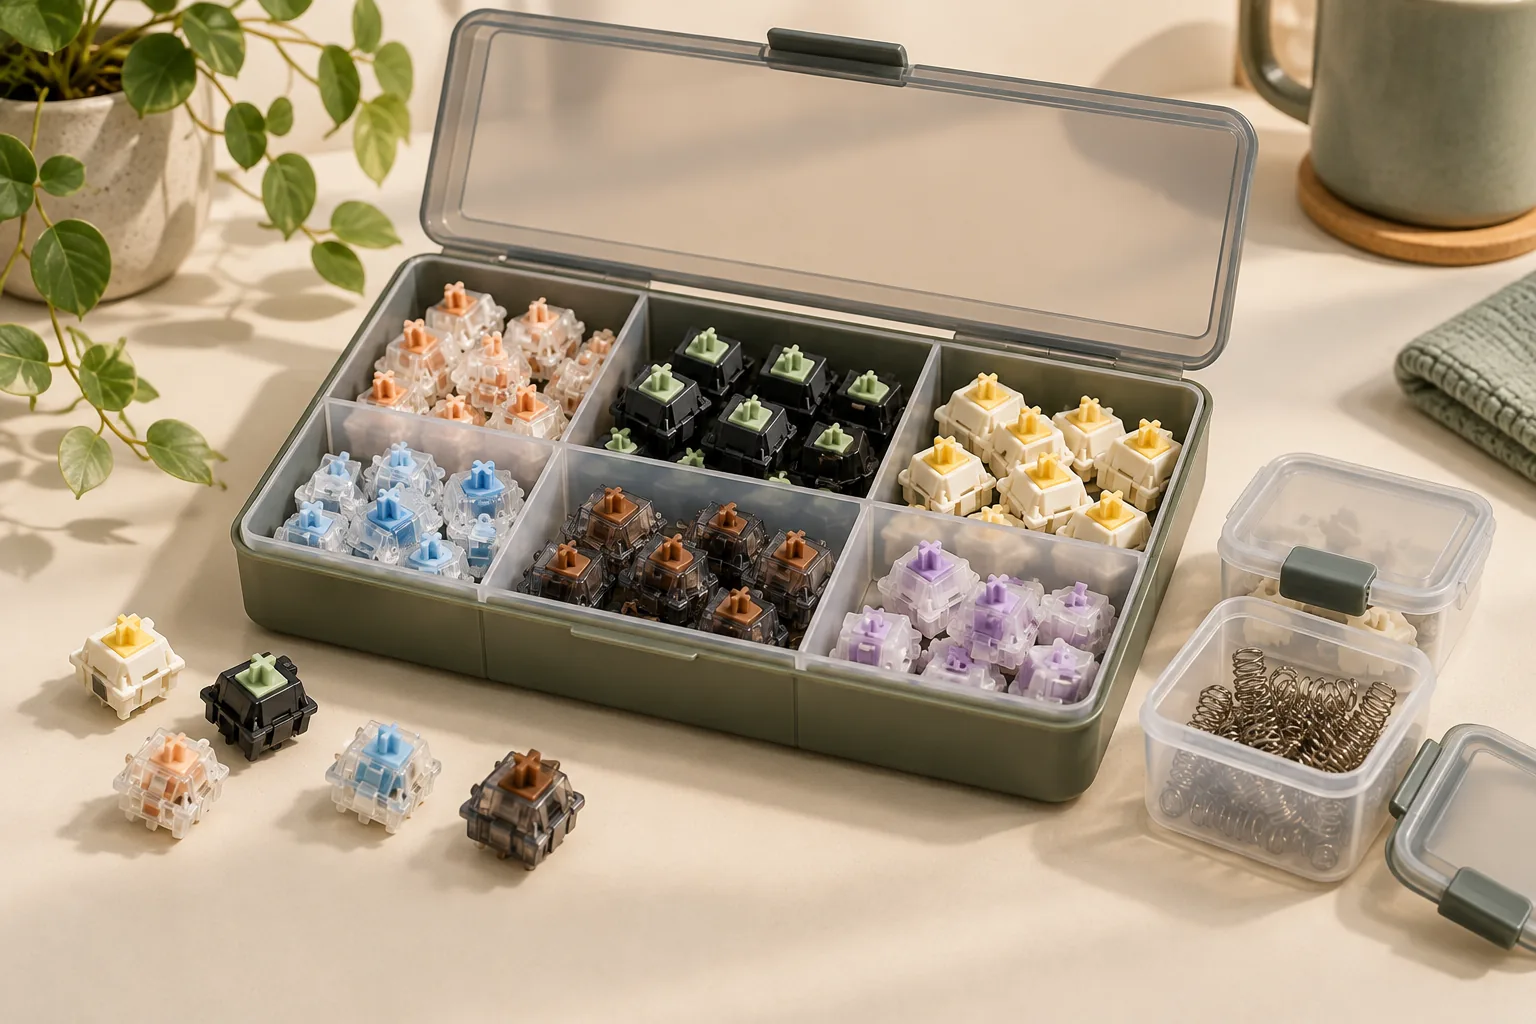
Store loose keyboard switches by keeping pressure off their pins, checking the actual fit of each container, and separating batches by modification and test status. Put springs and spare housings in their own labeled subcontainers. These are handling precautions: Fantech explains that bent switch pins can cause intermittent or missing input.
This guide is for keyboard builders organizing leftover switches, modified batches, and small spare parts. It covers container selection, pin clearance, and labeling, with practical checks you can apply before buying storage.
Quick takeaways
- Choose bulk storage for an identified batch when individual separation is unnecessary; check how the contents rest and move.
- Consider separate compartments when you need to keep switches apart, but verify clearance around the pins and lid.
- Record the switch model, modifications, quantity, and test status on each batch.
About this guide: Recommendations draw on product-listing and handling excerpts captured October 15, 2026. Manufacturer features are attributed below. The organization workflow is editorial guidance, and no hands-on container testing is claimed.
Jump to: Pin handling · Fit worksheet · Container comparison · Kailh specifications · Batch labels · Care checks · FAQs
Inspect switches before storing them
Start by looking at the pins before a switch joins a batch. Set aside anything visibly bent or damaged and identify it as needing inspection. Fantech connects bent pins with intermittent or absent registration, while noting that other problems can produce similar symptoms. A visual check therefore does not establish that a switch works; keep condition and functional test status as separate records. Source: Fantech.
When arranging the contents, check whether another switch, a compartment wall, or the lid would press against a pin. Do not force the lid closed over a crowded batch. If the arrangement needs compression to fit, change the arrangement or choose another container.
Reducing loose movement is also a reasonable precaution. Glacier PC Gaming’s storage guide associates sliding switches with bent pins. That supports checking movement and contact points, but it does not establish a measured protection level for a particular jar, tray, or organizer.
Keep tools outside the loose-switch space. Give them a separate location rather than arranging them across exposed pins. The same approach applies to spare components: assign each type a labeled place instead of adding everything to one container.
Measure switches and spare parts before buying storage
Measure the actual parts you intend to store. Kinetic Labs’ storage article says switch containers need to accommodate varying shapes and sizes. A container’s name or exterior dimensions cannot answer every fit question.
Use a ruler or caliper, the actual switches, and a written record. Measure each distinct switch type in its intended storage orientation, including protruding pins. Then compare those measurements with usable internal dimensions supplied for the exact container or compartment.
A practical fit worksheet
| Check | What to record or inspect | Decision rule |
|---|---|---|
| Switch envelope | Maximum length, width, and height of the actual switch, including protrusions | Compare with usable internal space in the intended orientation |
| Pin clearance | Where the pins sit relative to the floor, walls, neighboring parts, and lid | Reject an arrangement that loads or compresses the pins |
| Lid clearance | Space above the contents when the lid closes normally | Do not rely on forcing the lid shut |
| Separation | Whether dividers keep individual switches apart or only divide groups | Match the compartment arrangement to the separation you need |
| Movement | Where loose parts could shift and make contact | Reconsider the layout if movement would load exposed pins |
| Spare-part space | Space needed for separately contained springs and housings | Allocate accessory space independently of switch space |
| Tool space | Dimensions of any tools you plan to store nearby | Use a separate compartment or container |
| Missing specifications | Internal dimensions or clearance details the listing does not provide | Ask for the missing information before relying on fit |
This worksheet is a selection method, not a universal fit certification. If the seller provides only exterior measurements, internal clearance remains unresolved. Do not calculate an assured switch count from the outside dimensions.
Choose between bulk containers and separated storage
Choose according to how you organize and handle your parts. A bulk container may suit one clearly identified batch. Separate compartments are worth considering when you want individual switches or small groups to remain apart, provided their geometry passes the fit checks above.
The table distinguishes documented product features from storage arrangements you must evaluate yourself.
| Option | When to consider it | What still needs checking |
|---|---|---|
| Bulk switch container | You want one labeled location for a batch of the same model and modification status | How the switches rest, how much they move, and whether the lid or neighboring parts load pins |
| Separated tray or compartments | You want switches or small groups kept physically apart | Actual compartment dimensions, divider arrangement, pin clearance, and clearance above the contents |
| Kinetic Labs Switch Container | You want the maker’s advertised stacking and dust-seal features | Exact size and internal fit; the advertised features do not establish individual pin isolation |
| Labeled subcontainers for spares | You need distinct locations for springs, housings, or other small parts | Each part’s dimensions, closure, and identifying information |
Kinetic Labs describes its Switch Container as stackable and having an air-tight seal intended to prevent dust and dirt buildup. Those are manufacturer statements. They do not establish waterproofing, impact protection, or pin isolation.
For a batch that will stay in one storage location, start by evaluating whether bulk storage meets your organization needs. If you expect frequent handling or movement, give separation and restraint closer attention. Neither a bulk container nor an unspecified divided tray should be treated as a tested transport case.
A divider also needs interpretation. A large divided compartment might separate models while still allowing switches within that compartment to touch. Check what is physically separated before treating the organizer as individual switch storage.
Read the Kailh storage box specifications correctly
The Kailh Switch Storage Box listing at Keychron illustrates why dimension labels matter. It lists the product size separately from the package size.
| Listed specification | Value | What it establishes |
|---|---|---|
| Product size | 83.4 × 93.35 × 97.6 mm | The listed exterior product dimensions |
| Package size | 110 × 110 × 130 mm | The listed packaging dimensions |
| Included items | One switch storage box, one package box, and one sticker | The stated package contents |
Neither dimension set specifies usable internal clearance. The package measurements describe the packaging, so they cannot be used to size the storage space. The product measurements likewise do not establish the dimensions available inside.
The included-item list also does not document a spring compartment, tool compartment, or pin-isolating insert. If any of those features matters to your setup, obtain details for the exact product before choosing it. Treat this as a specification-reading example rather than a universal recommendation for every switch or accessory.
Label stock and modified batches separately
Use a batch to mean switches sharing the same model, modification history, and recorded status. Keep stock switches separate from lubricated switches, and distinguish filmed or spring-swapped batches whenever their histories differ. Store visibly damaged parts separately from parts awaiting ordinary use. For film-specific fit and assembly checks, see the switch-film guide.
This is an editorial organization workflow. The sources support measuring varied components and handling pins carefully; they do not provide experimental evidence that a particular label format prevents mistakes.
A useful label should answer these questions:
- Identity: What is the exact switch model and variant?
- Quantity: How many parts are currently in the container?
- Lubrication: Is the batch stock or lubricated, and what treatment is known?
- Other modifications: Were films added or springs changed? Record the actual details you know.
- Test status: Is it untested, tested, or awaiting inspection? Record what was checked and when.
- Condition: Are there visible defects or a reason to keep the batch aside?
Write “unknown” when history is uncertain. Do not infer an unknown lubricant, spring specification, or test result from appearance. Update the label when you remove parts or change the batch.
Worked example: one model, several histories
Imagine a project that leaves you with stock switches, lubricated switches, and spring-swapped switches of the same model, plus a visibly damaged switch. Give each group a separate labeled location. Record lubrication and spring changes independently so a switch modified in both ways has both changes documented.
Keep the damaged switch in a separate inspection container. Keep “untested” distinct from any recorded functional result. If only part of a batch was checked, identify that subset rather than applying its result to the whole group.
For spare springs and housings, use separate labeled subcontainers. Record the known model association or origin and any modification details. If the origin is uncertain, preserve that uncertainty on the label rather than assigning the parts to a model by guesswork.
Check care instructions and purchase details
Before choosing a container, look for the maker’s care instructions for that exact product. The information supporting this guide does not establish approved cleaning agents, dishwasher use, or numerical temperature and humidity limits. Ask the maker about missing care guidance rather than borrowing instructions from a different container.
Use the official Keychron Kailh listing or Kinetic Labs Switch Container listing to investigate those specific examples. Confirm the selected variant, internal measurements, included components, and care information before ordering.
At checkout, check the current price, availability, shipping terms, and return conditions yourself. Those commercial details are not established here. If fit depends on an undocumented dimension, resolve it before relying on the purchase.
Frequently asked questions
Can I keep keyboard switches loose in a jar?
A bulk container is an option for an identified batch, but inspect how the switches rest and move inside it. Keep pressure off the pins and avoid forcing the lid closed. Loose storage is not verified pin isolation; Glacier PC Gaming associates sliding movement with bent pins.
Does an air-tight switch container protect pins or make storage waterproof?
An air-tight claim alone does not establish either capability. Kinetic Labs describes its seal in connection with preventing dust and dirt buildup. Pin clearance requires a separate fit check, while waterproofing would need its own supporting specification. Evaluate each claimed feature on its stated terms.
How many switches will fit in a storage box?
There is no supported universal count across switch types and arrangements here. Measure your actual switches and compare them with usable internal space. The Kailh listing’s product and package dimensions do not establish internal clearance, individual pin separation, or room for every accessory you might add.
Put the storage plan into practice
Start with one batch: inspect its pins, record its model and modification history, and measure the actual parts. Compare those measurements with usable container space, then check where the pins sit when the container closes normally.
Choose bulk or separated storage according to that arrangement and your handling needs. Keep small spares separately identified, and update labels as parts change. Your next step is to complete the fit worksheet for the switches you already own before selecting a container.